Category: Fertilizers

TEA FLUSH CALSENDAR & SIMPLE NUTRION PLAN

How to Read Weather and Plan Farm Work

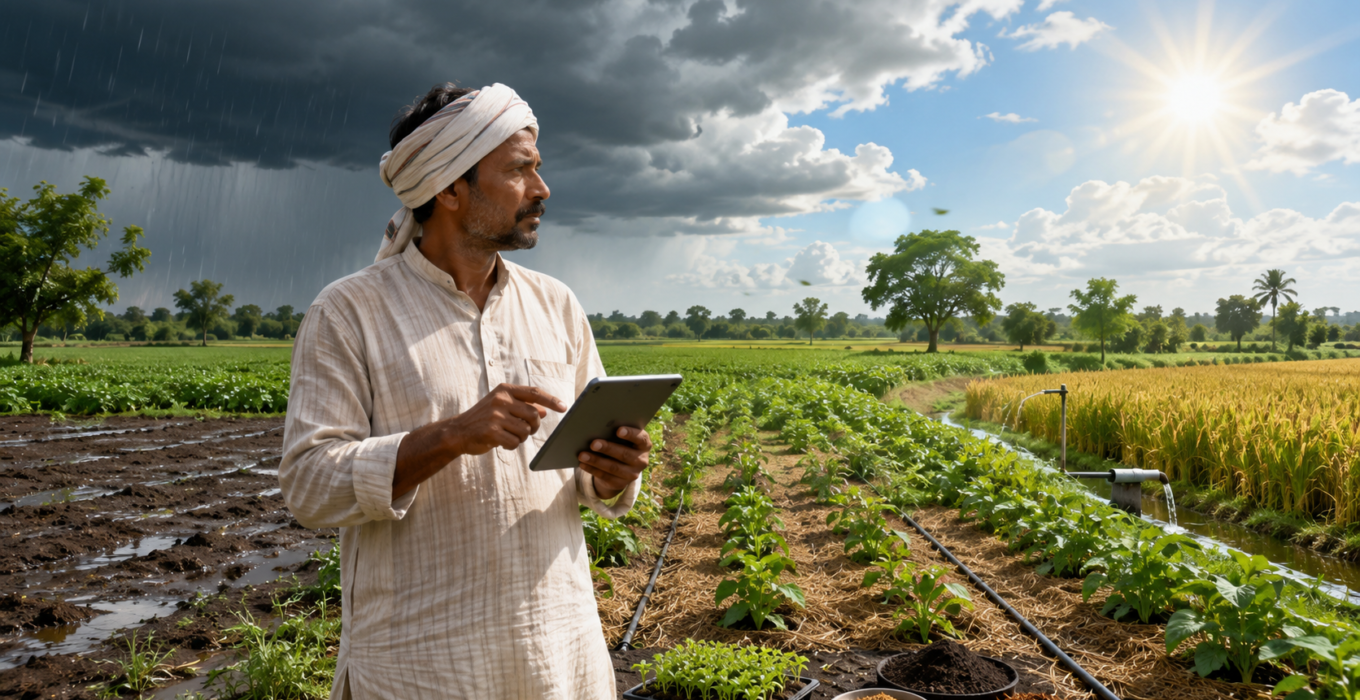
Weather is not just something to “check”; it is a decision-making tool for the farm. In India, IMD’s agromet advisory system gives district/block-level forecasts for rainfall, maximum and minimum temperature, wind speed and direction, relative humidity, and cloudiness, and these advisories are issued twice a week to help farmers plan day-to-day operations.

1) Start with the crop stage, not just the forecast

The most useful weather advice is always crop-specific. IMD’s SOP says advisories are built around the crop, the district or block, normal sowing dates, soil moisture, crop stage, and even crop-pest relationships. That means the same rain forecast can mean very different things for a seedbed, a flowering crop, or a crop ready for harvest.

2) Read rainfall first

Rainfall is usually the first thing to check because it affects sowing, irrigation, harvesting, and other field operations. IMD forecasts and agromet bulletins are designed to help farmers take those kinds of decisions, and extension work on weather advisories says accurate forecasts help with planning sowing, irrigation, and harvesting, while extended-range forecasts help farmers prepare for dry spells or heavy rain.

A practical rule is simple: if heavy rain is likely soon, avoid jobs that need a dry field or dry leaf surface. That is an inference from the forecast variables IMD provides, especially rainfall, cloudiness, and humidity.

3) Check maximum and minimum temperature

Maximum temperature tells you how hard the crop may be pushed by heat during the day, while minimum temperature helps you judge night stress, fog risk, and slower crop recovery. FAO notes that changes in temperature and precipitation affect soil moisture, crop yields, and production risk, and that high temperatures can push crops close to their tolerance limits.

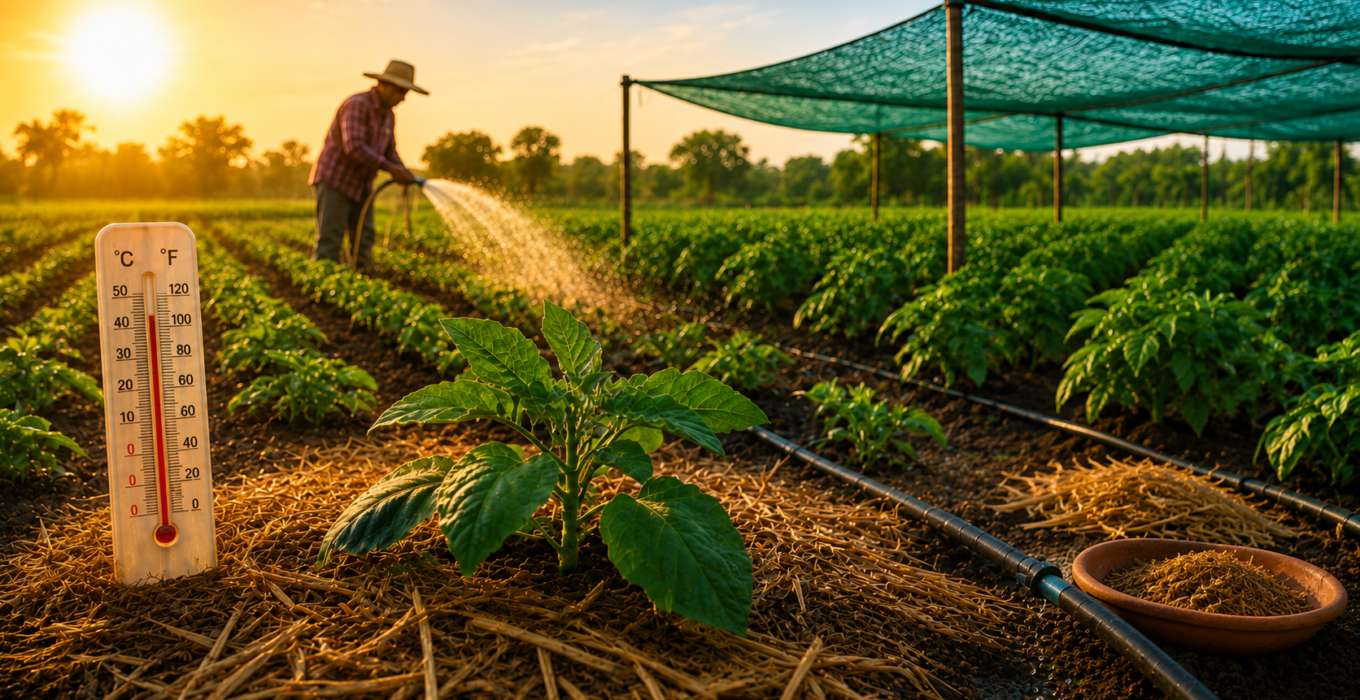
In practice, a hot forecast means you should think about irrigation timing, mulch, shade for seedlings, and whether a transplant or spray should wait for a cooler window. That is especially important in vegetables, young transplants, and container plants.

4) Use wind, humidity, and cloudiness to judge timing

Wind speed and direction matter because IMD includes them in district/block forecasts for agriculture. High wind can make spraying less effective and more likely to drift, while higher humidity and cloudiness often mean slower drying after irrigation or spraying. IMD’s advisory system also includes pest and disease risk advisories, which is useful because wetter, cloudier conditions can raise disease pressure in many crops.

That means a forecast is not just “rain or no rain.” It is a way to judge whether the day is good for spraying, fertilizing, transplanting, or leaving the field alone. That is an inference from the weather variables IMD says it uses in agromet bulletins.

5) Use short-range forecasts for operations and longer-range forecasts for strategy

IMD’s agriculture forecasts go up to five days at district/block level, and they are refreshed twice a week. Those are the forecasts you should use for immediate field work. For bigger decisions, like changing sowing dates, selecting short-duration varieties, or preparing for a dry spell, extended-range forecasts are more useful because they help you anticipate larger weather patterns rather than just tomorrow’s weather.

FAO also emphasizes that adaptation in agriculture is not just about surviving one weather event; it is about adjusting crops, varieties, and management to a changing pattern of temperature, rainfall, and extremes.

6) A simple daily weather routine for farmers

A practical routine is easy:
Check the forecast in the morning, match it with the crop stage, then decide what to do that day. If rain is likely, shift sowing or spraying. If it is very hot, protect the root zone and reduce stress. If wind is high, avoid spray work. If humidity is high and clouds are building, watch for disease risk and slow drying. This is exactly the kind of day-to-day planning IMD’s agromet advisory system is built to support.

7) How Biosar fits into weather-based planning

This is where Biosar fits naturally. Biosar’s site shows a range that includes biofertilizers, organic fertilizers, bio stimulant-type products, micronutrients, soil conditioners, and related nutrient-management inputs. When you plan around weather, it becomes easier to choose the right input at the right time instead of applying everything blindly.

That matters because weather-based farm planning is really about timing: using the forecast to decide when to feed, when to protect, and when to wait. For growers, that usually means less waste, fewer mistakes, and better crop response. Biosar’s microbial and soil-health products can fit into that logic because they are most useful when they are timed to crop need, soil condition, and the weather window ahead.

The simplest way to remember it

      • Read weather in this order:
      • Rain first
      • Then temperature
      • Then wind
      • Then humidity Then crop stage

If you do that consistently, your farm work becomes more planned and less reactive. That is the real value of agromet advisories.
TEA FLUSH CALSENDAR & SIMPLE NUTRION PLAN

How to Keep Plants Alive During Summer

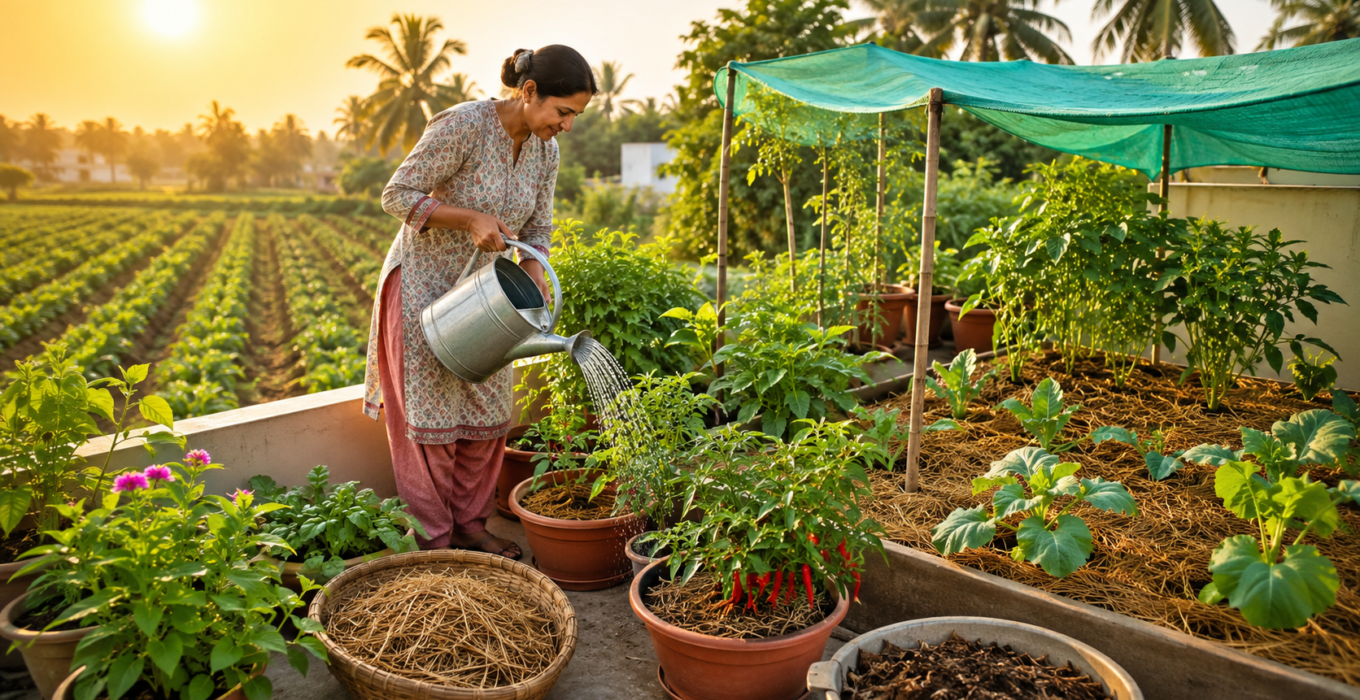
Summer is the season when plants can go downhill fast. Heat increases evaporation from the soil, dries out pots quickly, and puts extra stress on roots and leaves. Extension guidance consistently says the best summer strategy is simple: water smartly, keep the soil covered, and reduce direct heat exposure when possible.

1) Water early, and water deeply

The best time to water is usually early morning, when temperatures are cooler and less water is lost to evaporation. Extension sources also recommend deep watering rather than small, frequent splashes, because shallow watering encourages shallow roots and makes plants more vulnerable to heat and drought.

For container plants, the rule is a little stricter. Pots dry out much faster than garden beds, so they may need water in the early morning and again in the evening during heatwaves. It is also important to soak the pot until water comes out of the bottom, because dry potting mix can let water run down the edges without reaching the roots.

2) Mulch everything you can

Mulch is one of the easiest summer fixes. It helps reduce evaporation, keeps the soil cooler, and slows down weed growth. Extension guidance recommends organic mulches such as straw, compost, shredded leaves, or decomposed manure, usually in a layer about 2 to 4 inches deep.

Just do not pile mulch against the stem or trunk. Extension advice warns that mulch placed directly against crowns or stems can cause rot.

3) Give sensitive plants some shade

When heat gets extreme, shade cloth can help a lot. Iowa State Extension recommends starting with about 30 to 50 percent shade cloth for many plants, while other extension sources advise moving potted plants to a shadier spot during heat waves.

This matters especially for seedlings, newly transplanted crops, and container plants, which are more vulnerable to heat stress. Shade should sit above the plant, not directly on top of leaves, so it does not trap heat or cause leaf burn.

4) Check containers often

If you grow in pots, summer care has to be more active. Container plants heat up and dry out quickly, so extension advice says to check them frequently, move them if needed, and test moisture with your finger or a moisture meter. Smaller pots dry out faster than larger ones.

A pot that feels very light usually needs water. If the mix is completely dried out, water may run down the side of the container instead of soaking in properly, so slow watering is better than a quick splash.

5) Do not push stressed plants too hard

When a plant is already struggling in high heat, heavy feeding or harsh sprays can make things worse. Extension guidance warns that fertilizer and pesticide applications should be handled carefully during heat stress because plants are already under pressure.

That does not mean stop all care. It means use gentle, targeted support and avoid overdoing inputs during the hottest part of the day.

6) Keep soil healthier before the heat arrives

The best summer defence starts earlier in the season. Soils with more organic matter hold moisture better and cope better with hot weather. FAO notes that improving soil moisture retention and protecting the soil surface are key ways to reduce water stress.

That means compost, mulch, and regular soil care are not extras. They are the foundation of summer survival.

7) For field crops, protect the root zone first

For crops in the ground, the root zone matters more than anything else. Deep, well-timed watering, mulch, and shade protection for young transplants can make a big difference. IMD agromet advisories specifically recommend light and frequent irrigation for crops such as vegetables, groundnut, onion, sunflower, sesame, fodder crops, orchards, and green gram during heat conditions.

How Biosar fits into summer plant care

This is where Biosar fits naturally. Biosar’s product range includes biofertilizers, organic fertilizers, micronutrients, soil conditioners, and growth promoters, which can support healthier root zones and steadier plant nutrition during stressful weather. Biosar also carries products such as Biosar HIRA, Biosar Power, Biosar CAMS, and Biosar NPK, which are aimed at soil health, nutrient availability, and better plant performance.

For summer care, that matters because stressed plants do better when the soil is in good shape and nutrient supply is balanced rather than pushed too hard. Products designed for soil conditioning and microbial support can fit into a summer strategy that focuses on resilience, not just quick growth.

Simple summer survival checklist

A good summer routine looks like this: water early, mulch well, shade sensitive plants, check pots often, and avoid unnecessary stress. Those five steps are the easiest way to keep plants alive when temperatures climb.

Summer does not have to wipe out your garden. If you protect the roots, keep the soil covered, and water in a way that reaches the plant instead of the air, most plants can make it through the heat much better. For both hobby gardeners and farmers, the goal is not just survival for one hot week, it is keeping the plant strong enough to recover and keep growing.

TEA FLUSH CALSENDAR & SIMPLE NUTRION PLAN

A beginner’s guide to tea nursery care

A tea nursery is where strong tea gardens begin. If the nursery stage is done well, the young plants are healthy, uniform, and ready to survive planting in the field. TRA Tocklai’s guidance describes nursery work as part of the broader tea husbandry system, with the goal of raising vigorous planting material and protecting it through proper nursery management.

1) Start with the right planting material

Tea can be raised from seed or from cuttings, but the important thing is to use material suited to your region and planting plan. Tocklai notes that tea production depends on good nursery technique, young tea management, shade, drainage, manuring, and pest control, which shows that nursery care is not one single step but a full system.

2) Choose a nursery site that is easy to manage

A good nursery site should be easy to access, have reliable water, and allow shade management. Tea nursery guidance from tea-research and nursery manuals consistently stresses that the nursery environment must support frequent watering, shade control, and protection from stress so the young plants can grow evenly.

3) Use shade wisely

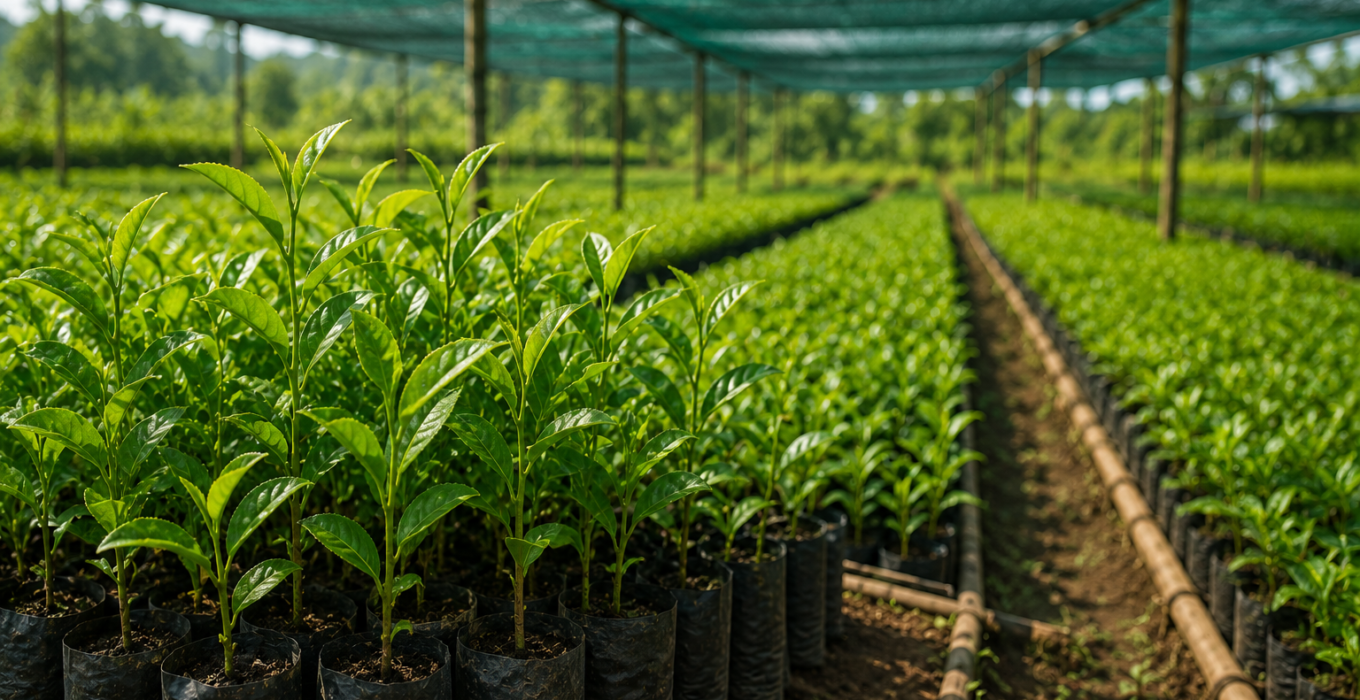
Young tea plants do not like harsh direct sun all the time. Tea nursery manuals recommend shade structures that provide roughly 50% to 60% shade, and they also note that shade should be adjusted depending on the weather and the growth stage of the plants.

4) Keep the soil or medium moist, not waterlogged

Watering is one of the most important nursery habits. Tea nursery guidance says frequent watering may be needed in dry weather, but excess watering should be avoided because young tea plants are sensitive to stress and poor drainage. In practical terms, the medium should stay evenly moist so the roots can grow without rotting.

5) Watch for weeds, pests, and disease

A nursery needs close observation. Tea nursery manuals recommend weekly inspection of beds for weeds, insects, and diseases, with manual weeding and timely treatment where necessary. This is important because weak nursery plants can become weak field plants later.

6) Protect the root system when transplanting seedlings

If seedlings are transferred into polybags or containers, the roots must be handled carefully. Nursery guidance from planting-material manuals says the taproot should stay straight and should not be bent, because bent roots can affect later field establishment.

7) Harden seedlings before planting them out

Hardening is the stage that prepares nursery plants for the field. The basic idea is to reduce watering gradually and expose the seedlings more to sunlight so they become tougher before transplanting. Tea nursery manuals describe hardening-off as a gradual process, not a sudden one, and stress that this improves survival after planting out.

8) Do not rush planting out

Tea nursery work is meant to produce strong young plants, not just tall ones. Tocklai’s tea guidance repeatedly connects nursery technique with later young tea management, because nursery quality affects field performance, establishment, and the long-term productivity of the garden.

A simple beginner’s routine

A beginner-friendly tea nursery routine looks like this: prepare the site, arrange shade, keep the medium moist, inspect weekly, control weeds by hand, harden seedlings slowly, and only then move them to the field. That sequence matches the practical nursery advice given in tea-research and nursery-management materials.

How Biosar fits into tea nursery care

This is where Biosar can fit naturally. A tea nursery needs healthy soil biology, balanced nutrition, and steady plant support, which is exactly the kind of space where Biosar’s biofertilizers, organic fertilizers, and micronutrient products can help support root development and early plant vigour. For growers, that means the nursery is not just a place to keep seedlings alive; it is the first step in building a stronger tea crop.

Beginner mistakes to avoid

The most common mistakes are too much sun, too little shade, too much water, rough handling of seedlings, and skipping hardening. Tea nursery guides also show that regular observation and careful management matter more than trying to “force” growth with extra inputs.

A good tea nursery is quiet work, but it saves time, money, and loss later. If the young plants are uniform, well rooted, hardened properly, and protected from stress, the field stage becomes much easier. That is why nursery care is one of the most important parts of tea farming.

TEA FLUSH CALSENDAR & SIMPLE NUTRION PLAN

How to Spot Overfertilization in Crops

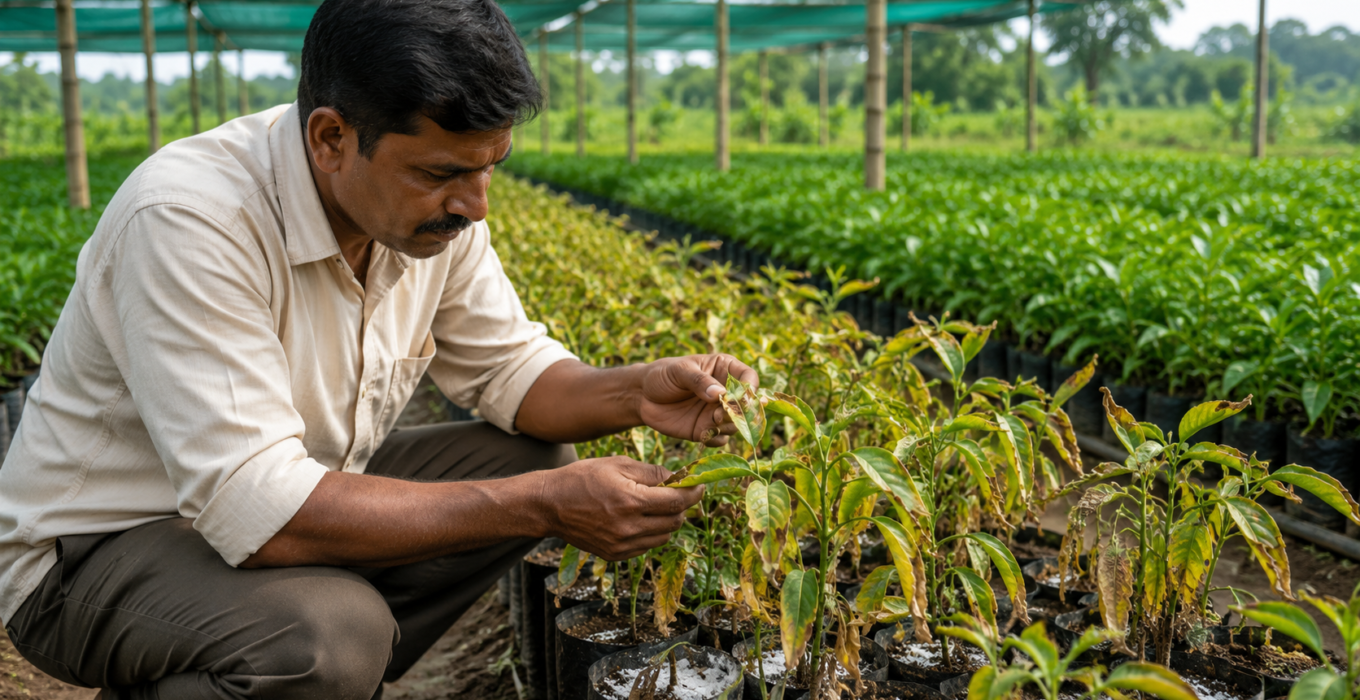
Overfertilization is easier to miss than most growers think. A crop can look fed because it is green or growing fast, but too much fertilizer can actually damage roots, burn leaves, and reduce yield. In many cases, the problem shows up as salt injury, where excess dissolved fertilizer makes it harder for roots to take up water.

The most common warning signs

The first signs are usually leaf-edge burn, leaf scorch, and browning at the tips or margins. Extension guidance notes that excess fertilizer damage often appears this way, especially when soluble salts build up around the roots. Plants may also show wilting, yellowing, and stunted growth, even when the soil seems wet enough.

Another common clue is slow or no growth after feeding. Instead of a healthy response, the crop may become weak, drop leaves, or look dull and stressed. Penn State Extension lists yellowing and wilting of lower leaves, browning leaf tips and margins, blackened roots, and very slow growth as key signs of over-fertilization.

What the roots may look like

If you pull up a badly affected plant, the roots may be dark, damaged, limp, or rotting. That happens because high salt levels can injure root tissue and reduce water uptake. Once the roots are damaged, the plant may wilt even though the soil is moist.

Leaf symptoms that are easy to confuse

Overfertilization can sometimes look like a nutrient deficiency, pest problem, or drought stress. The difference is that fertilizer burn often starts after feeding and usually shows up as burnt margins, tip scorch, or a salt crust on the soil surface. A white crust around the pot or bed is a strong hint that salts have built up.

Too much phosphorus can also create a different problem: it can block uptake of zinc and iron, which leads to false deficiency symptoms in the crop. So sometimes the plant is not hungry; it is imbalanced.

Crops that show it quickly

Potted plants, vegetables, seedlings, ornamentals, and young transplants often show overfertilization first because their root zone is small and salt builds up faster. Flower crops can show the classic leaf scorch pattern very clearly.

What to do if you suspect overfertilization

If the plant is still salvageable, stop feeding immediately and water deeply to help flush excess salts out of the root zone, as long as drainage is good. For potted plants, moving to clean soil or repotting may be needed if the damage is severe. The important thing is to act quickly before root injury gets worse.

How to prevent it

The easiest prevention is simple: feed by crop stage, not by habit. Use the right dose, the right timing, and the right product for the crop. Avoid repeated habitual feeding. Soil or leaf testing is much safer than guessing, especially when the crop is already stressed. University guidance also emphasizes that visual symptoms are only a starting point; soil and plant analysis are better for confirming what is actually wrong.

How Biosar fits in

This is where Biosar’s product range can help growers make smarter choices instead of heavier ones. Biosar offers biofertilizers, micronutrient fertilizers, organic fertilizers, and nutrient-management products that support more balanced feeding, including options such as microbial biofertilizers and micronutrient blends. That makes it easier to correct nutrition carefully rather than overloading the crop with one harsh input.

For growers, the practical lesson is simple: more fertilizer is not more care. The right amount, at the right time, is what protects the crop.

Watch for:

TEA FLUSH CALSENDAR & SIMPLE NUTRION PLAN

How to prepare land before sowing

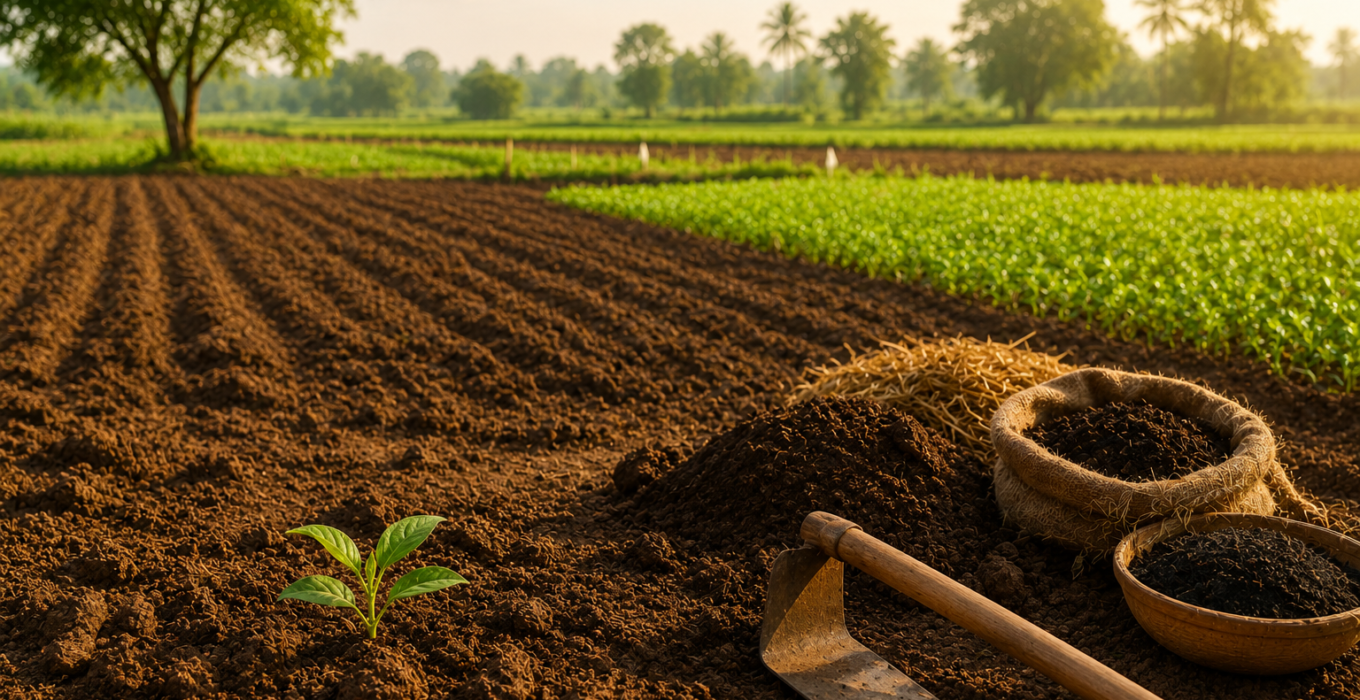
Good crops usually begin before the seed ever goes into the ground. If the land is prepared well, the seed gets better contact with soil, moisture is easier to manage, weeds are easier to control, and the young crop establishes faster. FAO describes land preparation as the first step in giving crops the soil conditions they need for germination and root development, while extension guidance also stresses that a good seedbed should be firm, fine, moist, and clear of weeds.

1) Start by clearing the field or bed

Remove weeds, old crop debris, stones, and other obstacles first. This makes it easier to work the soil and reduces early competition for water, light, and nutrients. A clean start also helps the new crop emerge more evenly

2) Check the soil before you do anything else

Before sowing, it is smart to know your soil’s condition. Soil tests can show pH and nutrient levels, which helps you decide whether you need lime, compost, or fertilizer adjustments before planting. Extension sources note that soil testing is especially useful because it can reveal whether the soil is too acidic and what nutrients are already present.

3) Make the soil loose, but not powdery

The goal of tillage or cultivation is to create a seedbed that is loose enough for roots to grow and seeds to sprout, but not so overworked that it becomes dusty or crusted. FAO notes that several tillage steps such as ploughing, harrowing, rolling, and smoothing may be used to create good tilth and support root development.

4) Keep enough moisture in the soil

A good seedbed should be moist enough to help germination, but not muddy or waterlogged. Too much water can compact the soil, while too little can make germination weak and uneven. In dry areas, some growers pre-irrigate the land before sowing so the seed zone has enough moisture.

5) Level the land where needed

Levelling helps water spread more evenly and prevents small depressions from holding too much water. This is especially useful in fields where irrigation, transplanting, or uniform germination matters. FAO guidance on seedbed preparation also highlights the value of a level and uniform surface.

6) Add organic matter if the soil needs it

Compost, farmyard manure, and other organic inputs help improve soil structure and support better tilth. FAO notes that soil organic matter is central to soil quality, and it also helps with moisture retention and overall resilience. If your soil is weak, adding organic matter before sowing can make a real difference.

7) Use a stale seedbed if weeds are a big problem

If your field has a strong weed problem, one useful method is to prepare the seedbed early, let weed seeds germinate, and then remove those young weeds before sowing the main crop. FAO and research literature describe this as an effective weed-management approach in suitable systems.

8) Match the preparation to the crop

Different crops need different bed styles. Rice and wheat may use flatter, more uniform seedbeds, while vegetables, nurseries, and some horticultural crops often do better in raised beds or specially shaped beds. The main idea stays the same: the soil should suit the crop, the seed size, and the planting method.

A simple pre-sowing checklist

      • Is the field clear of weeds and residue?
      • Has the soil been tested for pH and nutrients?
      • Is the soil loose, fine, and not powdery?
      • Is moisture at the right level for germination?
      • Is the land level enough for uniform water movement?
How Biosar fits in

This is where Biosar becomes useful in practice. Once land is prepared, growers can use the right soil-building and crop-support products to make that good preparation pay off. Biosar’s range of biofertilizers, organic fertilizers, micronutrients, and soil-health inputs fit naturally into a pre-sowing plan because the goal is not just to plant seed, but to give that seed the best possible start. For farmers, tea gardens, and hobby growers, that means better soil habits, better early growth, and fewer avoidable problems after sowing.

Land preparation is not extra work. It is the foundation of the crop. If the soil is clean, tested, moist, level, and well-structured, sowing becomes easier and the plant has a far better chance of starting strong. That simple effort before planting often saves much more time and money later.

TEA FLUSH CALSENDAR & SIMPLE NUTRION PLAN

Role of Biostimulants in Crop Growth and Stress Management

Biostimulants are one of the most talked-about tools in modern crop nutrition because they help plants do more with the nutrients and conditions already available to them. In simple terms, a biostimulant is a substance or microorganism applied to the plant or soil to improve growth, nutrient-use efficiency, stress tolerance, root development, or crop quality. They are not pesticides, and they do not replace fertilizers; instead, they work alongside normal nutrition and crop management.

What biostimulants actually do

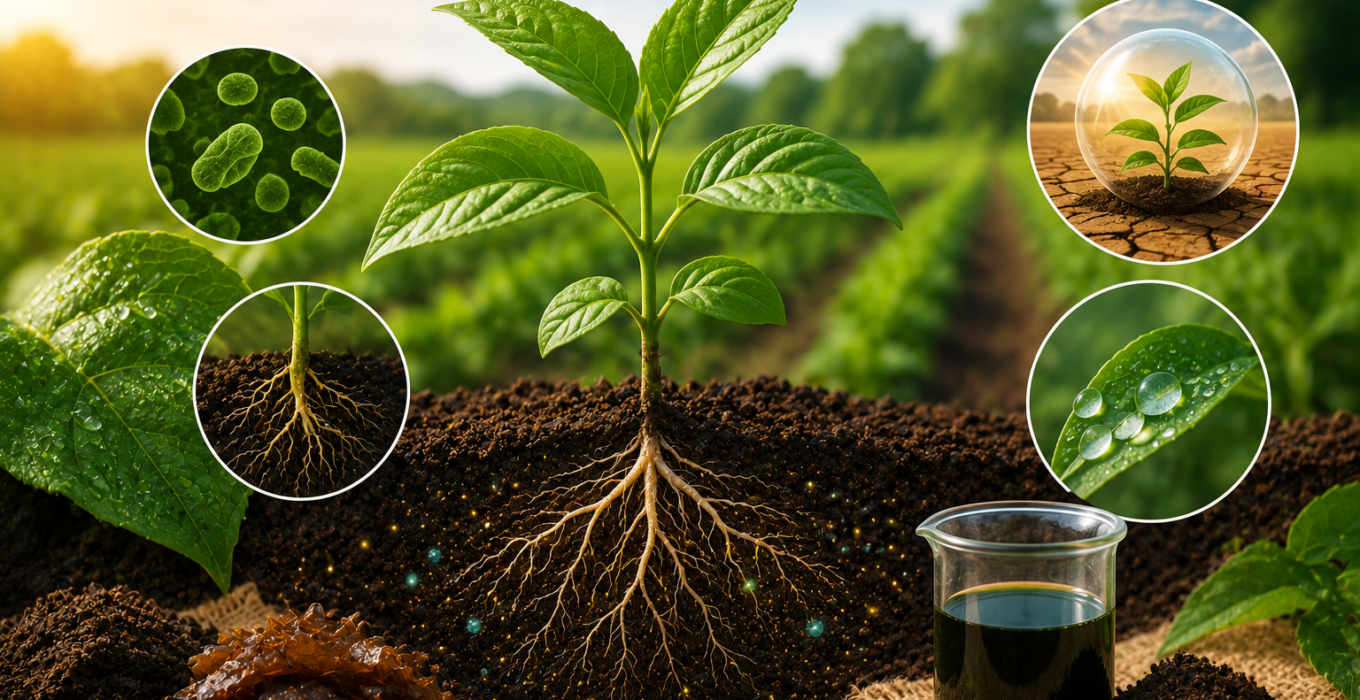
Their biggest value is that they help crops respond better to stress and nutrition. FAO describes biostimulants as helping with nutrient availability in the soil or rhizosphere, improving water-use efficiency, increasing uptake of applied or existing nutrients, and supporting tolerance to abiotic stress. Reviews of crop studies also show that biostimulants can improve plant growth, crop quality, and resilience under drought, heat, cold, and salinity stress.

That makes them useful in situations where a crop is not just “hungry,” but also under pressure. Heat waves, dry spells, transplant shock, poor root activity, and nutrient imbalance can all reduce performance. Recent agricultural research has shown that some commercial biostimulants can help plants cope with heat stress, while broader reviews note improvements in antioxidant activity, protective compounds, and stress-response pathways.

How they help crops grow better

Biostimulants work in several ways. Some improve root growth, so the plant explores more soil. Some help the crop absorb nutrients more efficiently. Some stimulate protective compounds such as antioxidants, proline, or heat-shock proteins that help the plant survive tough weather. Others improve microbial activity around the roots, which can make nutrients easier to access and support stronger overall plant health.

In practical farming terms, this can mean better early growth, stronger rooting after transplanting, improved flowering or fruit set, and better recovery after stress. That is why biostimulants are especially popular in horticulture, plantation crops, and high-value crops where even a small improvement in vigour or stress recovery can matter a lot.

What kinds of biostimulants are common

Biostimulants are a broad group. Reviews commonly mention humic and fulvic acids, seaweed extracts, amino acids, protein hydrolysates, chitosan, arbuscular mycorrhizal fungi, and plant-growth-promoting rhizobacteria. In other words, biostimulants can be organic compounds, extracts, or live microorganisms depending on the product and the crop need.

That variety is important because different crops and stress situations need different support. A transplant under heat stress may benefit from a root- and stress-oriented product, while a fruiting crop may need a product that supports nutrient uptake and fruit quality. There is no single “best” biostimulant for every situation.

Biostimulants are not a substitute for good agronomy

This is the most important point for beginners. Biostimulants can support crop growth, but they do not replace proper irrigation, soil health, balanced fertilization, pest management, or the right variety for the region. FAO also notes that biostimulants do not have direct action against pests, so they do not fall under pesticide use in the same way.

That means the best results usually come when biostimulants are used as part of a sensible crop plan: healthy soil, correct sowing time, enough water, and nutrition matched to crop stage. When used that way, they can improve efficiency and reduce stress losses.

Why this matters for stress management

Climate stress is becoming a bigger issue, and FAO’s 2024 discussion on abiotic stress and climate change highlights biostimulants as a useful tool for strengthening crop resilience. The practical idea is simple: if a plant can keep its metabolism steadier under heat, drought, or salinity stress, it has a better chance of maintaining growth and yield.

Research summaries also show that biostimulants may help reduce harmful reactive oxygen species, improve antioxidant enzyme activity, and increase the plant’s internal defence systems under stress. That is why they are often discussed as “stress mitigators” rather than just growth boosters.

How Biosar fits into this space

Biosar already has products that sit naturally in this biostimulant-and-soil-health direction. On its site, Grovita is described as a biostimulant plant growth enhancer with humic acid, fulvic acid, and bio-enhancers, while Natura is a humic-acid liquid growth booster. Biosar also offers HIRA and HIRA Plus, bio-enriched organic manures with beneficial bacteria that support soil fertility and plant growth.

That matters because growers often need a practical bridge between “nutrient management” and “stress management.” Products in this category can help improve root activity, soil biology, and nutrient availability, which makes them useful for farmers, tea gardens, and even serious home growers looking for stronger, steadier plant growth.

Biostimulants are best understood as helpers that improve how a crop grows, absorbs nutrients, and handles stress. They do not replace fertilizers or crop protection, but they can make both the plant and the soil work better together. For Indian agriculture, where heat, water stress, and soil fatigue are real challenges, that makes biostimulants a very practical part of the future.

TEA FLUSH CALSENDAR & SIMPLE NUTRION PLAN

How to Protect Crops from Extreme Summer Heat?

Extreme summer heat can hit crops fast. In April 2026, the India Meteorological Department warned that heat-wave conditions were likely in parts of northwest, central, and adjoining east India, which is a strong reminder that farmers need a heat plan before the damage begins.

Heat stress matters because high temperatures increase crop water loss, raise soil evaporation, and can disturb growth just when plants need stability most. FAO guidance on water stress and land management notes that protecting the soil surface and improving moisture retention are key ways to reduce heat-related stress.

1) Keep the soil covered

One of the simplest and most effective summer heat protections is mulch. FAO notes that mulching reduces soil evaporation and helps improve the micro-climate around crops, while Indian heat advisories from IMD specifically recommend straw mulch in vegetables and orchard crops to reduce evaporation.

For farmers, this means using straw, crop residue, compost, or other safe organic mulch around the root zone. For home gardeners, even a light mulch layer in pots can help the soil stay cooler for longer.

2) Water more wisely, not just more often

During hot spells, irrigation timing matters as much as irrigation amount. IMD’s agromet advisories recommend light and frequent irrigation for crops such as vegetables, groundnut, onion, sunflower, sesame, fodder crops, orchards, and green gram, and they advise doing this during cooler hours.

FAO guidance on crop water requirements also emphasizes that irrigation scheduling should match crop demand, because water stress grows quickly when evaporation is high. In practical terms, early morning and evening watering is usually safer than watering in peak afternoon heat.

3) Use shade where crops are most exposed

Shade nets and temporary shade cloth can help newly planted crops, seedlings, nurseries, and container plants survive intense heat better. IMD’s recent Agromet Advisories specifically mention installing shade nets for newly planted crops, and extension guidance from other universities also notes that shade cloth reduces crop temperature and water needs.

This is especially useful for young transplants, tea nursery material, vegetable seedlings, and balcony plants that dry out faster in hot weather.

4) Don’t feed or spray at the wrong time

High heat can make some sprays and nutrients harsher on plants. University of Maryland Extension advises avoiding fertilizer and pesticide applications when temperatures stay very high, because stress can increase the risk of phytotoxicity. That means the middle of a heat wave is usually not the best time for aggressive feeding or routine spraying.

The better practice is to apply foliar sprays, nutrients, or other inputs in the cooler parts of the day, only when needed, and only according to label directions. For a stressed crop, less forceful and more targeted action is usually safer than pushing hard with inputs.

5) Protect newly transplanted crops first

New transplants, young vegetable beds, and freshly planted orchards are the most vulnerable in summer heat. IMD advisories repeatedly emphasize drainage, irrigation management, and shade protection for standing crops and newly planted areas during adverse weather.

If you are planting in extreme heat, try to transplant in the evening, water immediately after planting, and keep the root zone shaded for the first few days. That small start can make the difference between survival and setback.

6) For pots and balcony gardens, check moisture much more often

Container plants heat up and dry out faster than field crops. Extension guidance on heat stress for container and garden plants says to check pots frequently, move them to a shadier spot if needed, and mulch the surface to reduce evaporation.

For hobby gardeners, that means watering early, using well-draining potting mix, and avoiding dark, heat-absorbing containers in full afternoon sun when possible.

7) Build resilience before the next heat wave

The best heat protection starts before the hot spell arrives. FAO and extension guidance both point to organic matter, mulch, better soil structure, and water-holding capacity as long-term defences against heat stress. In simple words, healthier soil handles summer better.

That is why heat protection is not only about emergency watering. It is also about making the soil more sponge-like, keeping it covered, and planning irrigation and nutrition ahead of time.

Where Biosar fits into this

Biosar’s product range is built around soil biology, biofertilizers, micronutrients, organic fertilizers, crop-special inputs, and support for tea, horticulture, and field crops. That means Biosar can fit naturally into a summer-heat plan by helping growers support the root zone, correct nutrient gaps, and keep plant nutrition more balanced while the crop is under stress.

Biosar’s biofertilizer category includes Azospirillum, Rhizobium, PSB, and KMB, while its micronutrient products include items such as zinc, boron, magnesium, calcium-magnesium-sulphur, and related nutrition inputs. For growers, that means there are options for building healthier soil and supporting nutrient balance, which is especially useful when heat makes crops more sensitive to stress.

A simple summer heat checklist

Before the hottest weeks arrive, try this:

      • Keep soil covered with mulch, crop residue, or compost,
      • Irrigate in cooler hours and more frequently if needed,
      • Use shade nets for new crops and seedlings,
      • Avoid strong fertilizer or pesticide applications during peak heat, and
      • Monitor pots, transplants, and young plants more closely than established ones.

Extreme summer heat does not have to ruin a season. The winning formula is simple: protect the soil, cool the root zone, water smartly, and avoid unnecessary stress on already stressed plants. For Indian farmers, tea gardens, and hobby growers alike, that is the most practical way to get through summer with less damage and better crop recovery.

TEA FLUSH CALSENDAR & SIMPLE NUTRION PLAN

Fertigation Basics

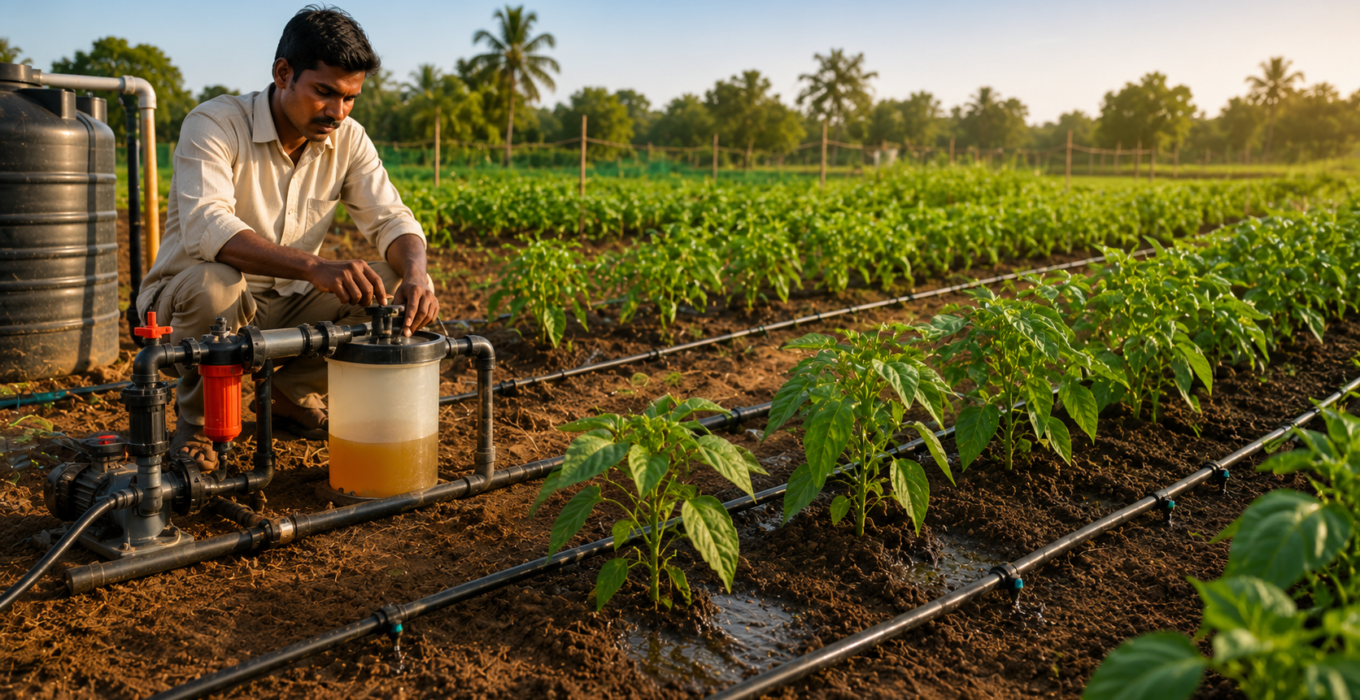
Fertigation means applying fertilizer through an irrigation system, so water and nutrients reach the root zone together. In drip or micro-irrigation systems, this is usually done with injectors or similar equipment that mix a soluble fertilizer solution into the irrigation water. It is especially useful when you want more precise nutrient delivery and better control over when the crop gets fed.

Why farmers use fertigation

The biggest advantage is control. Fertigation lets you place nutrients closer to the active root zone, time them more precisely, and reduce losses compared with blanket application. FAO and extension sources note that fertigation can improve water and nutrient use efficiency, reduce runoff and deep percolation, and lower labour needs when the system is designed and operated properly.

That is why fertigation is especially useful in drip-irrigated crops, water-stressed areas, and high-value crops such as vegetables, fruits, and plantation crops. Indian extension material also describes drip fertigation as useful for crops that need frequent nutrient and water supply near the roots.

What kind of fertilizers work best

Not every fertilizer is suitable for fertigation. The fertilizer must dissolve well in water, because undissolved particles can clog emitters and disturb the flow. Liquid fertilizers and fully water-soluble materials are generally the safest choices, and several extension sources stress the importance of solubility, purity, and compatibility.

In practice, fertigation is most often used for nitrogen, and it can also be used for phosphorus, potassium, calcium, magnesium, and soluble micronutrients when the crop and system allow it.

What you need before you start

A good fertigation setup usually needs a drip or other micro-irrigation system, a fertilizer injector, clean water, and a way to filter the water properly. Filtration matters a lot because clogging is one of the most common problems in drip systems. Water quality also matters, because dirty or chemically imbalanced water can damage the system and reduce nutrient delivery.

 A simple fertigation workflow

The beginner version is straightforward. First, choose a fertilizer that is clearly labelled as soluble or suitable for fertigation. Next, dissolve or mix it according to the label. Then run the irrigation system and inject the nutrient solution during the irrigation cycle so it reaches the root zone evenly. Finally, flush the system with clean water so no fertilizer remains in the lines or emitters. FAO guidance also notes that fertigation should be managed so nutrients are moved out of the system before irrigation ends.

 When fertigation is a better choice than soil application

Fertigation is often better when the crop needs frequent feeding, when water is limited, or when the goal is to use fertilizer more efficiently. Soil application is still the foundation for building long-term fertility, but fertigation gives you faster, more targeted delivery during active growth. That is why many growers use both methods together instead of choosing only one.

Common beginner mistakes

The most common mistakes are using the wrong fertilizer, skipping filtration, and letting the system clog. Another mistake is treating fertigation like a one-time shortcut instead of part of a planned crop-nutrition program. Extension sources also warn that water quality, fertilizer type, irrigation method, and economic feasibility all matter when deciding whether fertigation is the right fit.

 How Biosar fits into fertigation

For Biosar, fertigation makes sense wherever a product is water-soluble, liquid, or explicitly labeled for drip use. On Biosar’s site, some products already mention compatibility with drip irrigation systems or soil application via drip, such as Biosar B10.5 and Biosar Bena. Biosar also offers a wider range of biofertilizers and nutrient-management inputs, which can support a fertigation-style program when the product label allows it.

That matters because fertigation is not just about feeding a crop faster. It is about matching nutrition to plant demand, reducing waste, and using irrigation infrastructure more intelligently. For Indian farmers, tea gardens, and serious home growers, that can make nutrient management simpler and more precise.

 A simple rule to remember

If your fertilizer dissolves cleanly, your irrigation system is properly filtered, and your crop benefits from frequent small feedings, fertigation can be a very smart method. If your product is gritty, poorly soluble, or not approved for drip use, keep it out of the system.

Fertigation is one of the most practical ways to combine water and nutrient management. It works best when the system is clean, the fertilizer is suitable, and the crop really benefits from precise feeding. For beginners, the safest approach is simple: start with a small block, use only label-approved soluble inputs, and flush the system properly after feeding.

TEA FLUSH CALSENDAR & SIMPLE NUTRION PLAN

Foliar vs. Soil Application

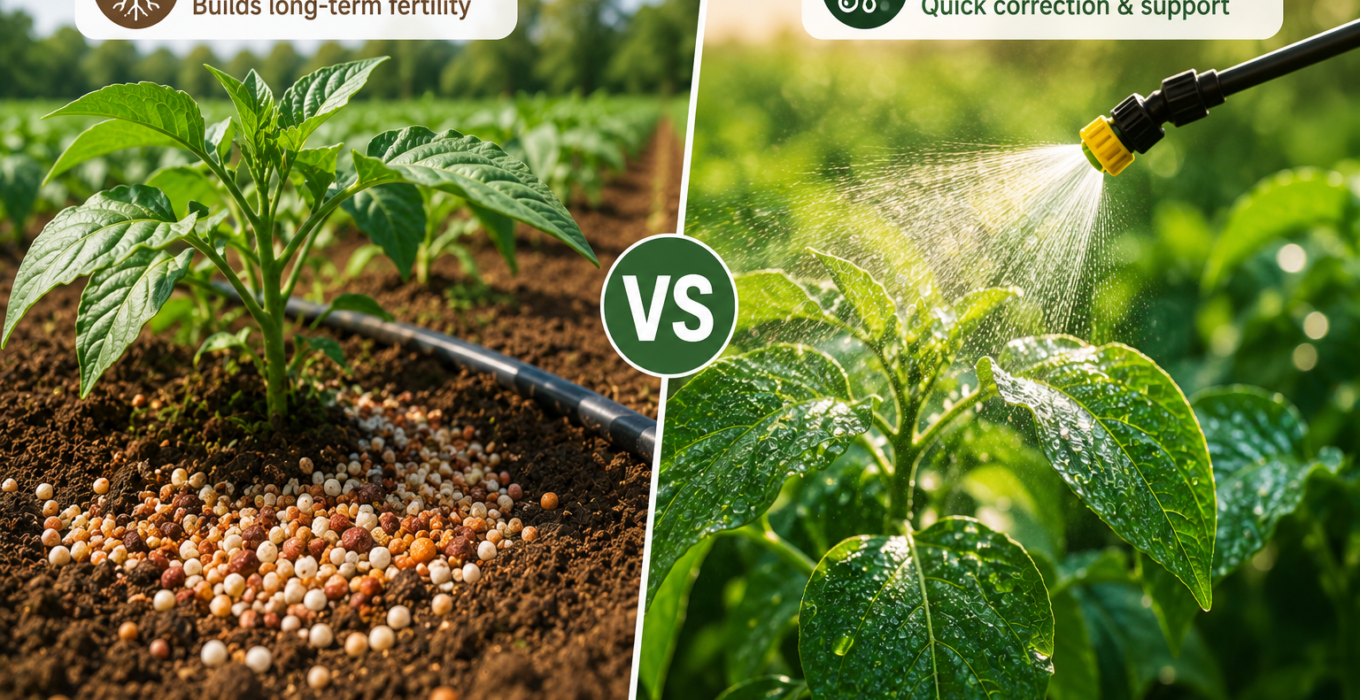
The short answer is: neither method is always better. The better method depends on what your crop needs, how fast it needs it, and what problem you are trying to solve. In most farming systems, soil application is the foundation, while foliar application is the quick helper. Foliar feeding can correct certain deficiencies quickly, but most nutrient uptake still happens through the roots.

What soil application does best

Soil application is the main way to build long-term fertility. It works best for base nutrients like nitrogen, phosphorus, and potassium, because these nutrients are normally managed in the root zone and absorbed through the soil. It is the standard method for keeping a crop nourished over time, especially when you want to build a healthy foundation before planting or during active growth.

Soil feeding is usually the better choice when:

      • You are preparing land before sowing or transplanting,
      • The crop needs a steady supply of nutrients,
      • You are dealing with large-field crops, or
      • You want to build soil fertility over the long run.
What foliar application does best

Foliar application means spraying nutrients directly on the leaves. It is useful when a crop needs a fast response, especially for micronutrient deficiencies or when root uptake is temporarily limited by weather, waterlogging, or poor soil conditions. FAO notes that foliar sprays are often used for micronutrients and sometimes urea, and that only water-soluble fertilizers that will not scorch leaves should be used.

Foliar feeding is usually the better choice when:

      • You need to correct a visible deficiency quickly,
      • Soil conditions are temporarily preventing nutrient uptake,
      • You are growing high-value fruits or vegetables, or
      • You want a targeted boost during a critical stage like flowering or fruit set.
Which crops benefit more from foliar feeding?

Foliar nutrition tends to be especially useful in fruit, vegetable, ornamental, and perennial crops where leaf testing and visual nutrient correction are common. University guidance notes that foliar testing is useful for fruit and vegetable crops because each crop has its own sampling needs and fertilizer requirements.

For some crops, foliar sprays are a strong support tool. For example, foliar iron sprays may help maintain plant health while soil pH is being corrected in acid-sensitive crops like blueberries and ornamentals.

When foliar feeding is not the main answer

Foliar fertilizers should not be treated as a default replacement for soil nutrition. In soybean, for example, University of Minnesota research found that routine prophylactic foliar fertilizer use did not improve yield and could reduce profitability when used without a visible nutrient deficiency. That is a good reminder that foliar products should be used for a reason, not just out of habit.

A simple rule by crop type

For field crops like wheat, maize, soybean, cotton, and rice:
Soil application is usually the main method. Foliar sprays can be added only when there is a clear deficiency or a specific agronomic need.

For vegetables and fruits:
Use soil feeding as the base, then use foliar sprays to correct micronutrient deficiencies or support growth during key stages.

For tea, plantation crops, and perennials:
Soil feeding builds the long-term base, while foliar sprays can help during periods of active growth or when rapid correction is needed.

For home gardens and potted plants:
Soil mix, compost, and slow-release feeding do most of the work. Foliar feeding can be a helpful extra tool, especially for micronutrients, but it should stay light and controlled.

The easiest way to decide

Ask these three questions :

      1. Do I need long-term feeding or a quick fix?
        Long-term feeding usually means soil. Quick fix usually means foliar.
      2. Is the problem in the soil or visible in the leaves?
        Soil issues usually need soil correction. Leaf symptoms may justify a foliar spray if the nutrient can be absorbed that way.
      3. Is my crop high-value and sensitive enough to justify foliar correction?
        If yes, foliar feeding can be useful. If not, soil feeding is often simpler and more economical.

For most crops, soil application is the main method and foliar application is the support method. Soil builds the crop. Foliar rescues it when needed. Used together, they can give you a stronger and more efficient nutrition plan.

TEA FLUSH CALSENDAR & SIMPLE NUTRION PLAN

Phosphates Without the DAP

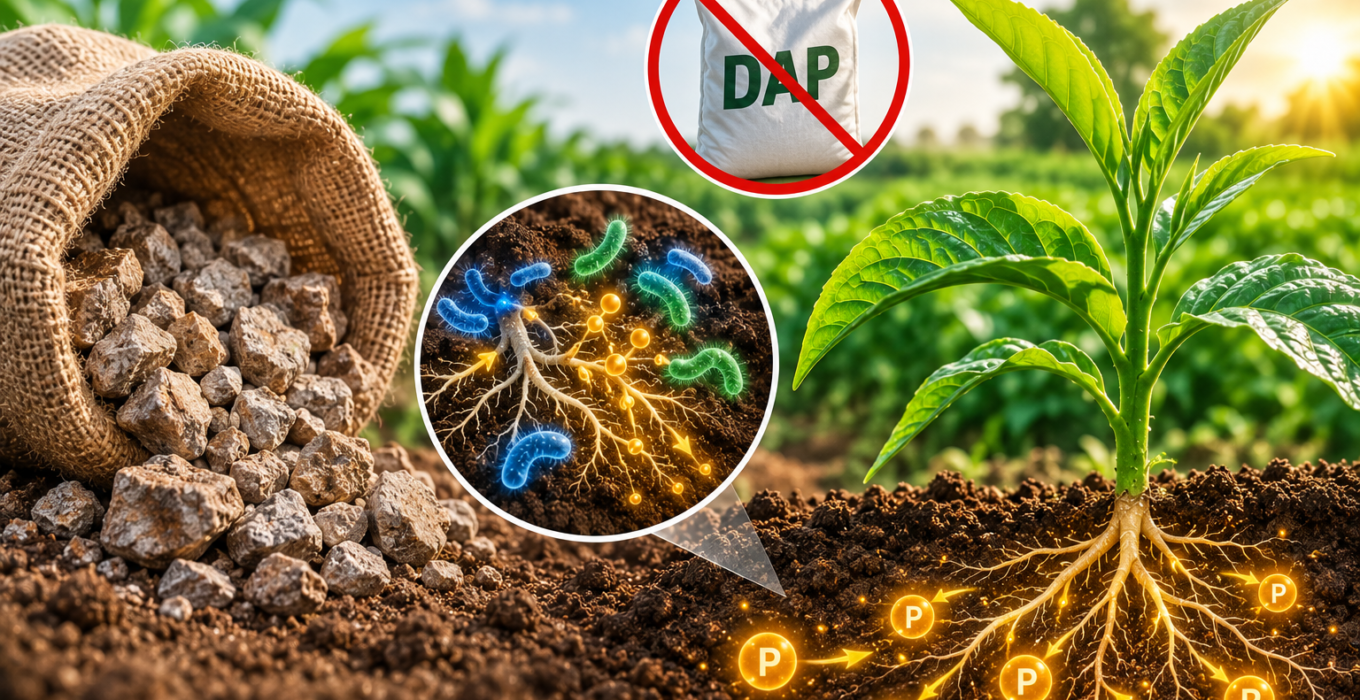
Biosar Sampoorna is presented on Biosar’s site as a phosphate-rich organic manure made by co-composting rock phosphate with organic matter to improve crop nutrition and soil health. In other words, it is designed to support phosphorus supply through a more biological, soil-building route rather than relying only on conventional chemical phosphate fertilizers.

What rock phosphate does

Rock phosphate is a natural mineral source of phosphorus, but on its own it is not always immediately available to plants. In many soils, phosphorus can become fixed in forms plants cannot easily use, especially in acidic or alkaline conditions. That is why farmers often do not get full benefit from raw rock phosphate unless it is processed, composted, or paired with helpful microbes.

Where the bacteria come in

This is where phosphate-solubilizing bacteria (PSB) matter. Research shows PSB can improve the agronomic efficiency of rock phosphate by releasing phosphorus into forms that plants can absorb more easily. Studies also note that PSB can enhance the use efficiency of both mineral phosphorus fertilizers and rock phosphate, especially when integrated into a well-designed crop nutrition system.

In practical terms, the bacteria act like tiny helpers in the rhizosphere: they produce organic acids and other compounds that help unlock fixed phosphorus in the soil. That means a product like Sampoorna is not just about adding phosphorus; it is about helping the soil biology make phosphorus more available over time.

How this compares with DAP and SSP

DAP and SSP are standard chemical phosphorus fertilizers used widely in Indian farming. They deliver phosphorus quickly, but they are still mineral fertilizers with a direct input cost and, in many soils, a risk of phosphorus fixation if conditions are not favourable. Research comparing SSP, rock phosphate, and PSB has shown that combining sources and microbes can improve available phosphorus and uptake in crops like paddy, especially when part of an integrated phosphorus strategy.

That is why Biosar Sampoorna is best understood as an alternative phosphorus strategy, not simply a one-to-one chemical substitute. It may be especially useful where the goal is to build soil health, reduce dependence on straight chemical inputs, and improve phosphorus availability through composting and microbial action.

Why farmers might care

For farmers, the practical appeal is simple: a product like Sampoorna may offer a more cost-effective and soil-friendly way to manage phosphorus, especially when the crop system benefits from organic matter and biological activity. Studies show that combining rock phosphate with PSB can improve phosphorus release and crop response, which is the scientific basis for why these products are used in sustainable farming programs.

This can matter in crops where soil health, long-term fertility, and input efficiency are important. Biosar also positions its product line around organic fertilizers and nutrient-management solutions, so Sampoorna fits neatly into a broader soil-first approach rather than a single-application mindset.

The simple takeaway

Biosar Sampoorna uses rock phosphate + organic matter + beneficial bacteria to make phosphorus more usable by plants. The idea is not to magically eliminate all chemical phosphorus needs in every situation, but to provide a natural, biologically active route that can reduce reliance on DAP or SSP in suitable systems.